

Unity Single Scene Architecture - GameOver
Series Post 5

Indie Game Studio Owner | Game Designer | Game Developer | Game Artist | Cloud Architect | Technology Leader | Product Manager | Entrepreneur
This is a post in a series about building a game in Unity using a single scene.
Unity Single Scene Architecture Series
In this post, we'll finish the game UI by adding a Game Over screen, a UI Manager and wire everything up to the Game Manager... with tests.
Refactoring Prefabs with Prefab Variants
If we follow the same steps as the previous two posts for framing out the UI, we'd be duplicating some of the exact same game objects and components, such as the canvas and the background panel. Just like with code, when you see duplication, it can be an opportunity to refactor. In this case, instead of making a new prefab for the canvas we can make a base prefab, then use prefab variants to customize for each screen's content.
Let's do this now:
- Add a child empty game object underneath "UI" named "GameOverController"
- Add a child to "GameOverController" from the context menu
UI > Canvasnamed "UICanvas" - Change the
Canvas Scalercomponent toScale With Screen SizewithReferenceResolutionset to 1920 x 1080 - Add a child to the canvas from the context menu
UI > Panel, named "Background" - Set the Image component
Colorto black with no transparency
That's enough for the base prefab. In the Project window create a new folder under "Bundles" named "UI". Drag the "UICanvas" from the scene into this folder to make a prefab, then delete it from the scene.
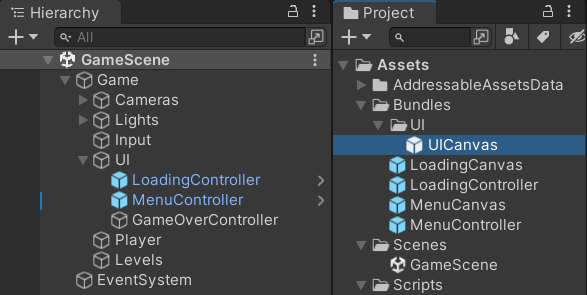
Now we have a base prefab for the three canvases needed for the UI, as well as any future ones.
Game Over Screen Variant
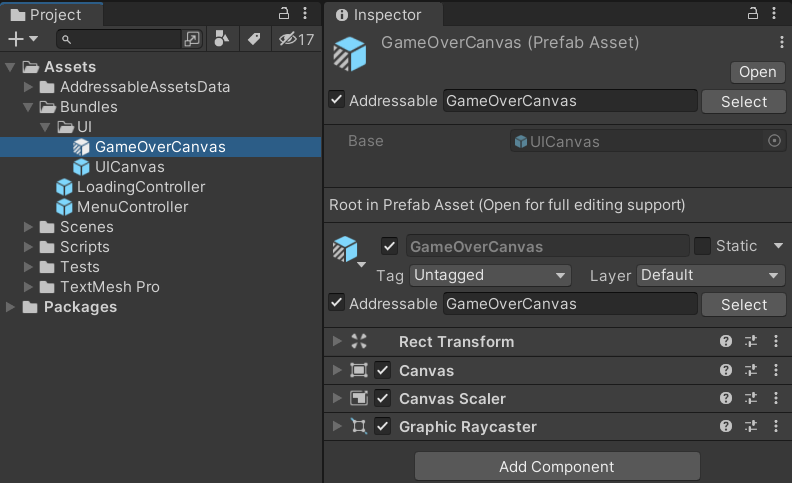
Now create the canvas for the Game Over screen. Select "UICanvas" in the Project then use the context menu Create > Prefab Variant to create a new variant named "GameOverCanvas" and open it in prefab editing mode:
- Add a child to "Background" with the context menu
UI > Text - Text Mesh Pro - Set the
Rect Transformto middle stretch. set the Y position to 100 andHeightto 200 - Set the text to "Game Over", center the horizontal and vertical alignments, set font size to 200
- Add another child to "Background" from the context menu
UI > Button - Text Mesh Pro - Set the width to 300, height to 100, Y position to -200
- Set the Text to "PLAY" with font size 64
Mark the prefab variant as Addressable with an address of "GameOverCanvas".
Looks a lot like the MenuCanvas right? We could use one prefab for both and maybe just change the text at runtime, but I am going to assume in the future the MenuCanvas will have more menu items for things like settings, credits, saved games, and more. We'll continue to keep these separated and distinct.
Loading Variant
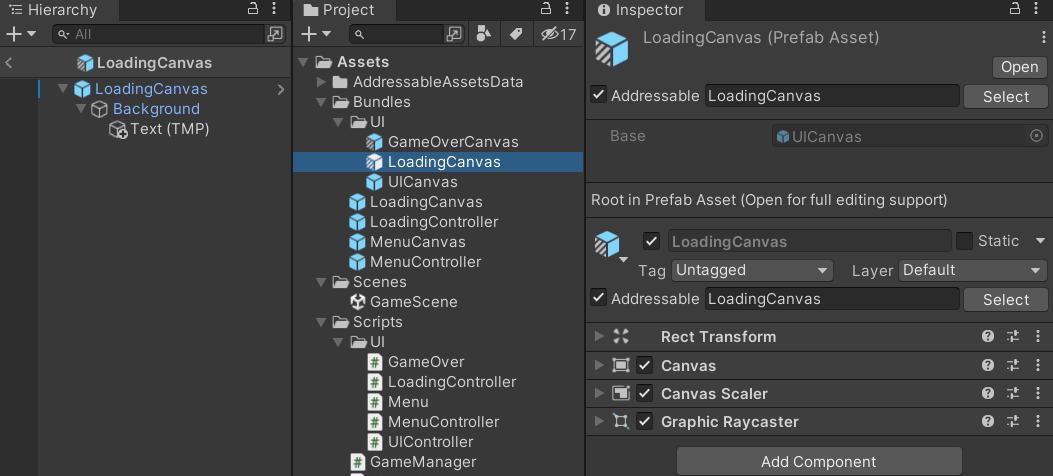
Duplicate the "GameOverCanvas" variant we just created and rename it to "LoadingCanvas" then open it in prefab editing mode.
- Delete the Button
- Change the text to "LOADING"
- Set the text Y position to 0
Mark the prefab variant as Addressable with an address of "LoadingCanvas".
Menu Screen Variant
Duplicate the "GameOverCanvas" variant again and rename it to "MenuCanvas" then open it in prefab editing mode.
- Change the text to "Single Scenery"
- Don't worry about the Button for now, we'll come back to that
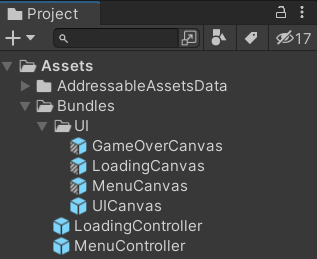
Mark the prefab variant as Addressable with an address of "MenuCanvas".

We still have the two old prefabs for the LoadingCanvas and MenuCanvas. Delete them both.
Refactor for Events
Before we add scripting to our "GameOverCanvas", I am unhappy with the way the UI events are being exposed for the "MenuCanvas". If you remember from the previous post, we're exposing the "OnClick" event of the button by making the entire button publicly accessible.
What if we later change that button to be something else, add more UI controls that have new events, or swap out UGUI for the new UI Toolkit (you know, when it's production ready in a few years)? Instead, let's have these loaded prefabs just emit plain events so that the parents of these objects do not need to know about their internals (encapsulation).
Scriptable Object Events
There are plenty of articles about using ScriptableObject, which is a sibling to MonoBehaviour meant to represent a custom asset in a Unity project. The script itself is not an asset, it is source code that gets compiled into a library at build time and distributed with the player, but the instances of that ScriptableObject, which can be created with the editor menu are assets (that can be addressable). Here's my version of a simple event class that allows listeners to add/remove callback methods, and publishers of the event to "invoke" it.
using System;
using UnityEngine;

namespace SingleScenery
{
    [CreateAssetMenu(fileName = "GameEvent", menuName = "Single Scenery/GameEvent")]
    public class GameEvent : ScriptableObject
    {
        private Action gameEvent;

        public void Invoke()
        {
            gameEvent?.Invoke();
        }

        public void AddListener(Action callback)
        {
            gameEvent += callback;
        }

        public void RemoveListener(Action callback)
        {
            gameEvent -= callback;
        }
    }
}
Now we can create instances of events and "inject" an event (via the editor) into an event invoker and one or more event listeners.
Event Button
Let's create a new component that can be added to a UI button and simply invoke a configured event on click. In the "Scripts\UI" folder add new script named "UIEventButton":
using UnityEngine;
using UnityEngine.UI;

namespace SingleScenery
{
    public class UIEventButton : MonoBehaviour
    {
        [SerializeField] private GameEvent onClickEvent;

        private Button _button;

        private void Awake()
        {
            _button = GetComponent<Button>();
        }

        private void OnEnable()
        {
            _button.onClick.AddListener(OnClick);
        }

        private void OnDisable()
        {
            _button.onClick.RemoveListener(OnClick);
        }

        private void OnClick()
        {
            onClickEvent.Invoke();
        }
    }
}
Configure a New Event
Now we can use our new GameEvent to create a new instance of an event in the project as a custom asset.
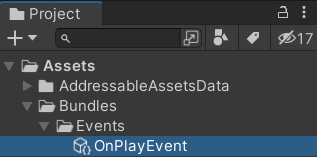
- Create a new folder in "Bundles" named "Events"
- Using the context menu
Create > Single Scenery > GameEventadd a new event named "OnPlayEvent"
Refactor the Menu Screen
Let's integrate our new event system into the menu screen classes.
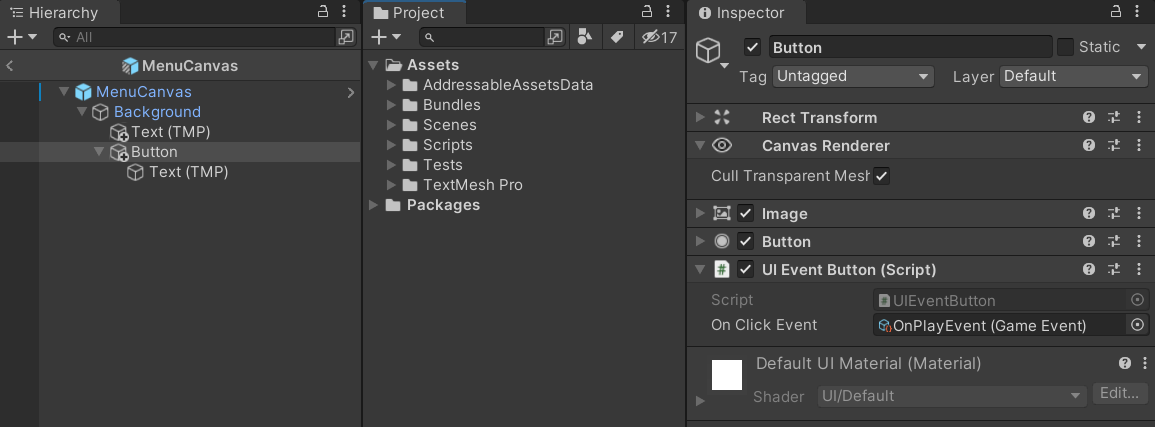
- Open the "MenuCanvas" prefab variant in the
Project - Select the "Button" and use
Add Componentto add the new "UI Event Button" component - Assign "OnPlayEvent" to the
On Click Eventfield
Open the "MenuController.cs" script and refactor it to listen to this new event, so that when the Play button is clicked, the controller will hide the menu.
using UnityEngine;

namespace SingleScenery
{
    public class MenuController : UIController
    {

        [SerializeField] private GameEvent onPlayEvent;

        private void OnEnable()
        {
            onPlayEvent.AddListener(Hide);
        }

        private void OnDisable()
        {
            onPlayEvent.RemoveListener(Hide);
        }

    }
}
Now the menu screen functionality is completely encapsulated.
But now we've broken our test code. Open "MenuController_Tests.cs" and replace the code with:
using System.Collections;
using NUnit.Framework;
using UnityEngine;
using UnityEngine.AddressableAssets;
using UnityEngine.ResourceManagement.AsyncOperations;
using UnityEngine.TestTools;
using UnityEngine.UI;

namespace SingleScenery
{
    public class MenuController_Tests
    {
        // Test Settings

        const string ADDRESS = "MenuController";
        const float DELAY = 3f;

        WaitForSeconds delay;
        MenuController controller;
        bool _setup;

        bool _playClicked;

        [OneTimeSetUp]
        public void OneTimeSetUp()
        {
            if (GameObject.FindObjectOfType<Camera>() == null)
            {
                new GameObject("Camera").AddComponent<Camera>();
            }

            delay = new WaitForSeconds(DELAY);
        }

        [UnitySetUp]
        public IEnumerator Setup()
        {
            if (_setup) yield break;

            var handle = Addressables.InstantiateAsync(ADDRESS);
            yield return handle;  // wait for async call completion

            Assert.That(handle.Status == AsyncOperationStatus.Succeeded);
            Assert.IsNotNull(handle.Result);

            controller = handle.Result.GetComponent<MenuController>();

            Assert.IsFalse(controller.Ready);

            _setup = true;

            Debug.Log("Setup: controller is instantiated in test scene");
        }

        [OneTimeTearDown]
        public void TearDown()
        {
            if (controller != null)
            {
                Addressables.ReleaseInstance(controller.gameObject);
            }

            Debug.Log("Teardown: controller reference is released");
        }

        [UnityTest, Order(1), Timeout(5000)]
        public IEnumerator Step_1_Load()
        {
            controller.Load();

            yield return new WaitUntil(() => controller.Ready);

            var canvas = controller.gameObject.GetComponentInChildren<Canvas>(true);

            Assert.That(controller.transform.childCount > 0);
            Assert.IsNotNull(canvas);
            Assert.IsFalse(canvas.gameObject.activeInHierarchy);

            Debug.Log("Test: controller load passed");
            yield return delay;
        }

        [UnityTest, Order(2)]
        public IEnumerator Step_2_Show()
        {
            controller.Show();

            var canvas = controller.gameObject.GetComponentInChildren<Canvas>(true);
            Assert.IsTrue(canvas.gameObject.activeInHierarchy);

            Debug.Log("Test: controller show passed");
            yield return delay;
        }


        [UnityTest, Order(3)]
        public IEnumerator Step_3_Click_Play()
        {
            var button = controller.gameObject.GetComponentInChildren<Button>(true);
            button.onClick.Invoke(); // simulate button click

            yield return null;

            // canvas should be hidden after event is consumed
            var canvas = controller.gameObject.GetComponentInChildren<Canvas>(true);
            Assert.IsFalse(canvas.gameObject.activeInHierarchy);

            Debug.Log("Test: play clicked passed");
            yield return delay;
        }

        [UnityTest, Order(4)]
        public IEnumerator Step_4_Hide()
        {
            controller.Show();
            yield return null;
            controller.Hide();

            var canvas = controller.gameObject.GetComponentInChildren<Canvas>(true);
            Assert.IsFalse(canvas.gameObject.activeInHierarchy);

            Debug.Log("Test: controller hide passed");
            yield return delay;
        }

        [UnityTest, Order(5)]
        public IEnumerator Step_5_Unload()
        {
            controller.Unload();
            yield return delay;
            Assert.That(controller.transform.childCount == 0);
            Debug.Log("Test: controller unload passed");
        }

    }
}
Now you can delete the "Menu.cs" script from "Scripts\UI", we won't be using it anymore. Always delete unused code. If you comment it out instead, then put a date on the comment with a "TODO" or searchable tag so you can come delete it later.
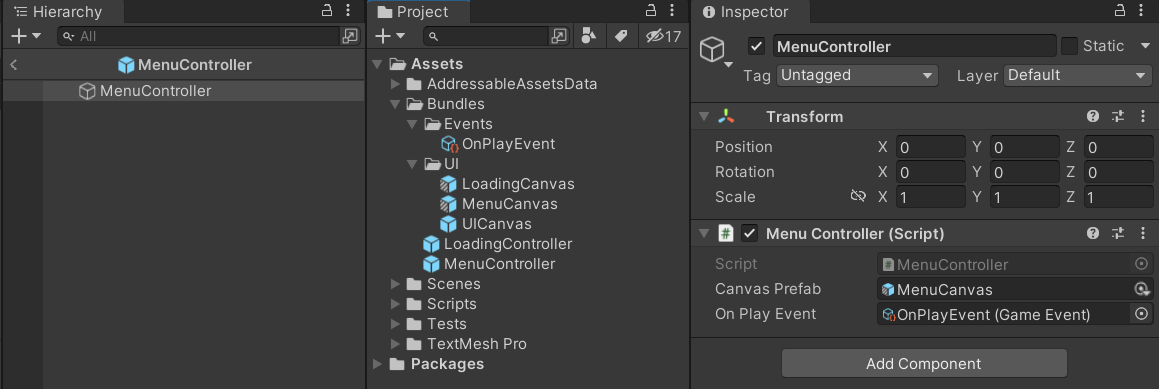
Last step is to open the "MenuController" prefab in the Project and assign the "OnPlayEvent".
Finish the Game Over Screen
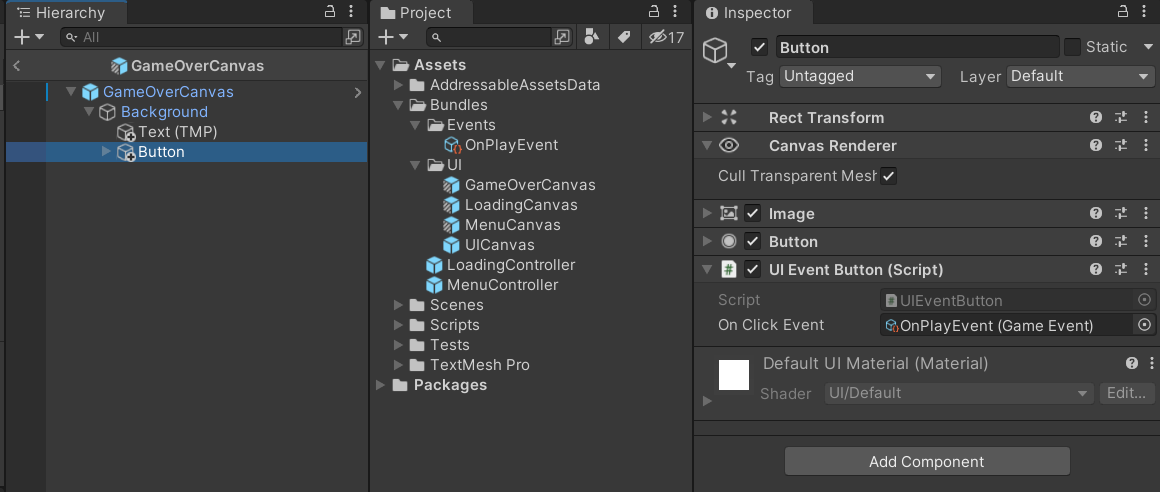
Now that we have successfully refactored, we can go back to the "GameOverCanvas" prefab variant, open it and add the "UIEventButton" script to the button. Assign the same "OnPlayEvent".
GameOverController
Create a new script in the "Scripts/UI" folder named "GameOverController".
using UnityEngine;

namespace SingleScenery
{
    public class GameOverController : UIController
    {
        [SerializeField] private GameEvent onPlayEvent;

        private void OnEnable()
        {
            onPlayEvent.AddListener(Hide);
        }

        private void OnDisable()
        {
            onPlayEvent.RemoveListener(Hide);
        }
    }
}
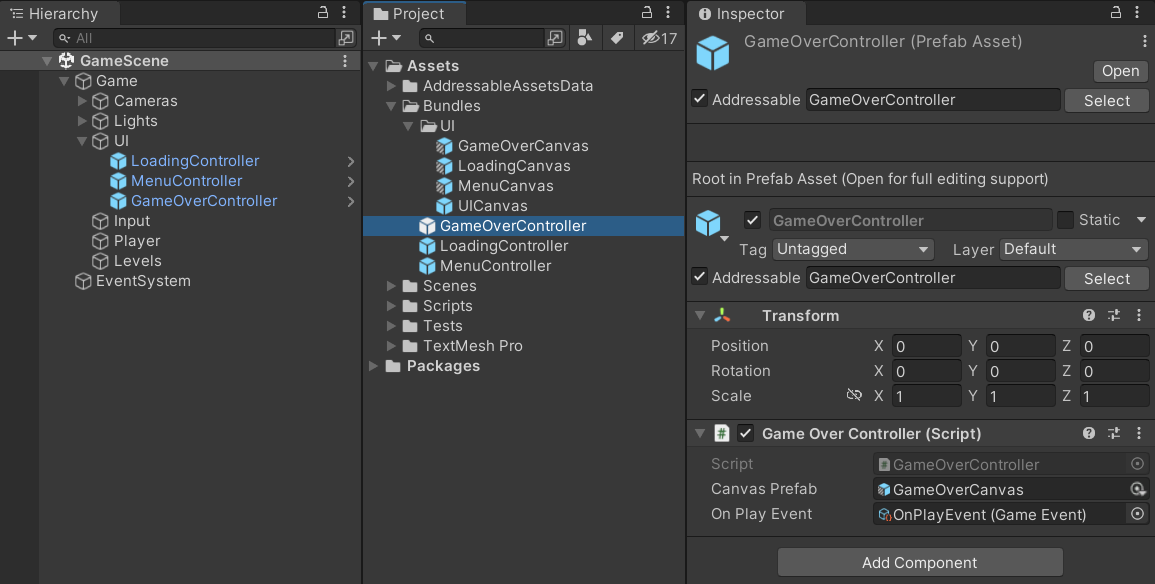
Drag this script onto "GameOverController" game object in the Scene and assign the fields. Drag the "GameOverController" into the "Bundles" folder to make it a variant.
Mark the prefab as Addressable with the address "GameOverController".
Add Tests
Create a new test script using the context menu Create > Testing > C# Test Script in the "Tests\UI" folder named "GameOverController_Tests".
using System.Collections;
using NUnit.Framework;
using UnityEngine;
using UnityEngine.AddressableAssets;
using UnityEngine.ResourceManagement.AsyncOperations;
using UnityEngine.TestTools;
using UnityEngine.UI;

namespace SingleScenery
{
    public class GameOverController_Tests
    {
        // Test Settings

        const string ADDRESS = "GameOverController";
        const float DELAY = 3f;

        WaitForSeconds delay;
        GameOverController controller;
        bool _setup;

        bool _playClicked;

        [OneTimeSetUp]
        public void OneTimeSetUp()
        {
            if (GameObject.FindObjectOfType<Camera>() == null)
            {
                new GameObject("Camera").AddComponent<Camera>();
            }

            delay = new WaitForSeconds(DELAY);
        }

        [UnitySetUp]
        public IEnumerator Setup()
        {
            if (_setup) yield break;

            var handle = Addressables.InstantiateAsync(ADDRESS);
            yield return handle;  // wait for async call completion

            Assert.That(handle.Status == AsyncOperationStatus.Succeeded);
            Assert.IsNotNull(handle.Result);

            controller = handle.Result.GetComponent<GameOverController>();

            Assert.IsFalse(controller.Ready);

            _setup = true;

            Debug.Log("Setup: controller is instantiated in test scene");
        }

        [OneTimeTearDown]
        public void TearDown()
        {
            if (controller != null)
            {
                Addressables.ReleaseInstance(controller.gameObject);
            }

            Debug.Log("Teardown: controller reference is released");
        }

        [UnityTest, Order(1), Timeout(5000)]
        public IEnumerator Step_1_Load()
        {
            controller.Load();

            yield return new WaitUntil(() => controller.Ready);

            var canvas = controller.gameObject.GetComponentInChildren<Canvas>(true);

            Assert.That(controller.transform.childCount > 0);
            Assert.IsNotNull(canvas);
            Assert.IsFalse(canvas.gameObject.activeInHierarchy);

            Debug.Log("Test: controller load passed");
            yield return delay;
        }

        [UnityTest, Order(2)]
        public IEnumerator Step_2_Show()
        {
            controller.Show();

            var canvas = controller.gameObject.GetComponentInChildren<Canvas>(true);
            Assert.IsTrue(canvas.gameObject.activeInHierarchy);

            Debug.Log("Test: controller show passed");
            yield return delay;
        }

        [UnityTest, Order(3)]
        public IEnumerator Step_3_Click_Play()
        {
            var button = controller.gameObject.GetComponentInChildren<Button>(true);
            button.onClick.Invoke(); // simulate button click

            yield return null;

            // canvas should be hidden after event is consumed
            var canvas = controller.gameObject.GetComponentInChildren<Canvas>(true);
            Assert.IsFalse(canvas.gameObject.activeInHierarchy);

            Debug.Log("Test: play clicked passed");
            yield return delay;
        }

        [UnityTest, Order(4)]
        public IEnumerator Step_4_Hide()
        {
            controller.Show();
            yield return null;
            controller.Hide();

            var canvas = controller.gameObject.GetComponentInChildren<Canvas>(true);
            Assert.IsFalse(canvas.gameObject.activeInHierarchy);

            Debug.Log("Test: controller hide passed");
            yield return delay;
        }

        [UnityTest, Order(5)]
        public IEnumerator Step_5_Unload()
        {
            controller.Unload();
            yield return delay;
            Assert.That(controller.transform.childCount == 0);
            Debug.Log("Test: controller unload passed");
        }

    }

}
Reconfigure Prefabs
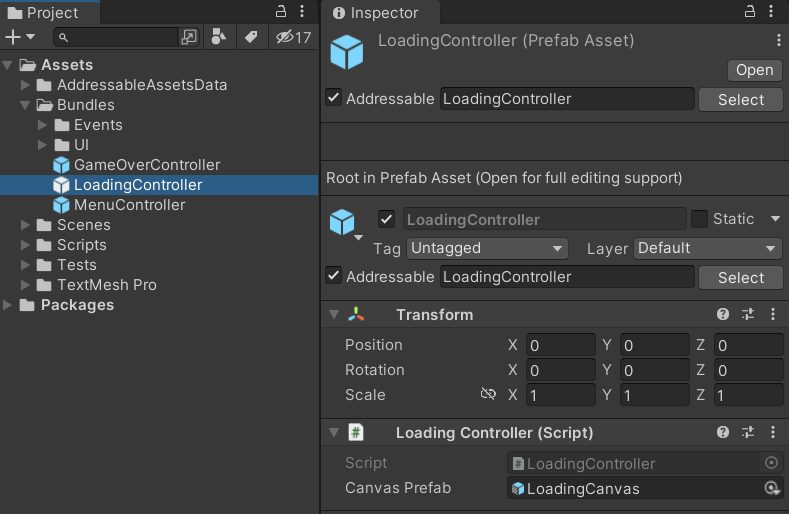
Select the "LoadingController" prefab in the Project and assign the "LoadingCanvas" prefab variant into the Canvas Prefab field in the Inspector.
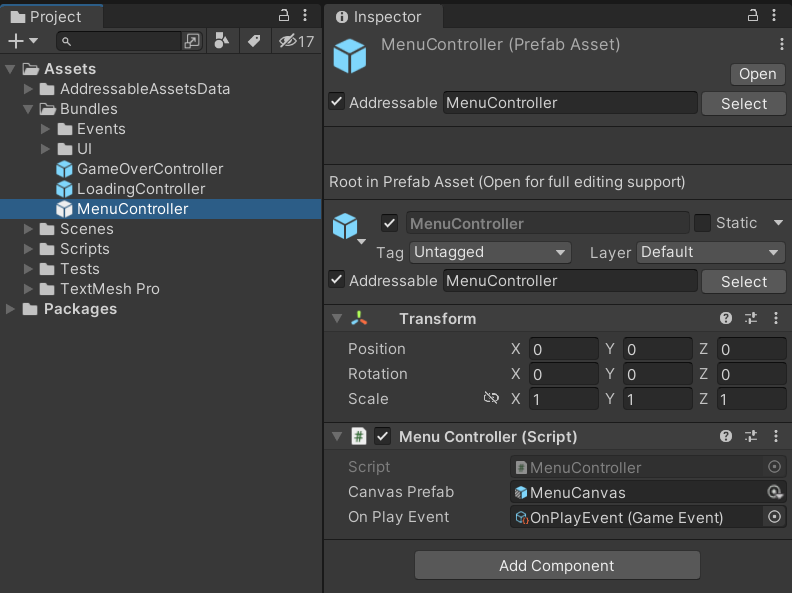
Select the "MenuController" prefab in the Project and assign the "MenuCanvas" prefab variant into the Canvas Prefab and the On Play Event fields in the Inspector.
UI Manager
We've got the screens we need for this very simple UI, now we need way to orchestrate them. Let's create the UIManager script now in "Scripts\UI".
using System.Collections;
using UnityEngine;

namespace SingleScenery
{
    public class UIManager : MonoBehaviour
    {

        [SerializeField] private LoadingController loadingController;
        [SerializeField] private MenuController menuController;
        [SerializeField] private GameOverController gameOverController;

        public void ShowLoading()
        {
            if (loadingController.Ready)
            {
                HideAll();
                loadingController.Show();
            }
        }

        public void ShowMenu()
        {
            if (menuController.Ready)
            {
                HideAll();
                menuController.Show();
            }
        }

        public void ShowGameOver()
        {
            if (gameOverController.Ready)
            {
                HideAll();
                gameOverController.Show();
            }
        }

        public void HideAll()
        {
            loadingController.Hide();
            menuController.Hide();
            gameOverController.Hide();
        }

        public IEnumerator LoadAssets()
        {
            yield return StartCoroutine(loadingController.LoadAsync());

            yield return StartCoroutine(menuController.LoadAsync());

            yield return StartCoroutine(gameOverController.LoadAsync());

        }

        public void UnloadAssets()
        {
            loadingController.Unload();
            menuController.Unload();
            gameOverController.Unload();
        }

    }
}
Not too complicated, the public API will allow the GameManager to choose when to load and unload assets, as well as methods to show and hide screens.
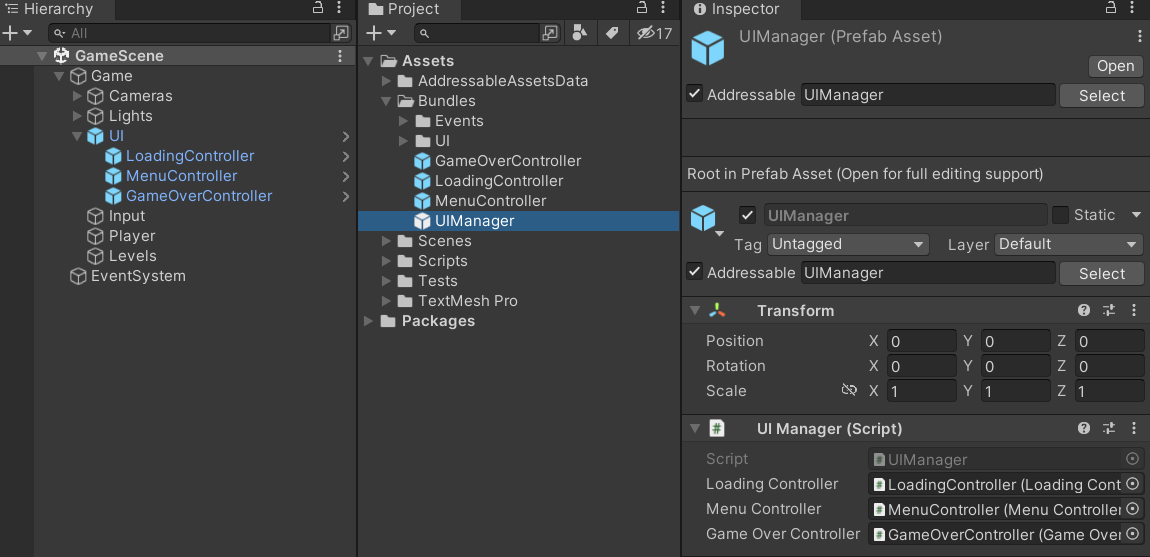
Drag this script onto the "UI" gameobject in the Scene, then drag the object to the "Bundles" folder in the Project to make it a prefab asset. Rename the prefab to "UIManager".
Mark the prefab as Addressable with the address "UIManager".
UI Manager Testing
Just like the controllers, we can write tests to load the UIManager as an addressable asset and execute its public API to verify the prefab is working.
using System.Collections;
using NUnit.Framework;
using UnityEngine;
using UnityEngine.AddressableAssets;
using UnityEngine.ResourceManagement.AsyncOperations;
using UnityEngine.TestTools;

namespace SingleScenery
{
    public class UIManager_Tests
    {
        // Test Settings

        const string ADDRESS = "UIManager";
        const float DELAY = 3f;

        WaitForSeconds delay;
        UIManager manager;
        bool _setup;

        [OneTimeSetUp]
        public void OneTimeSetUp()
        {
            if (GameObject.FindObjectOfType<Camera>() == null)
            {
                new GameObject("Camera").AddComponent<Camera>();
            }

            delay = new WaitForSeconds(DELAY);
        }

        [UnitySetUp]
        public IEnumerator Setup()
        {

            if (_setup) yield break;

            var handle = Addressables.InstantiateAsync(ADDRESS);
            yield return handle;  // wait for async call completion

            Assert.That(handle.Status == AsyncOperationStatus.Succeeded);
            Assert.IsNotNull(handle.Result);

            manager = handle.Result.GetComponent<UIManager>();

            _setup = true;

            Debug.Log("Setup: manager is instantiated in test scene");
        }

        [OneTimeTearDown]
        public void TearDown()
        {
            if (manager != null)
            {
                Addressables.ReleaseInstance(manager.gameObject);
            }

            Debug.Log("Teardown: reference is released");
        }

        [UnityTest]
        public IEnumerator Show_And_Hide_Loading()
        {

            yield return manager.StartCoroutine(manager.LoadAssets());

            var canvases = manager.GetComponentsInChildren<Canvas>(true);

            Assert.That(canvases.Length == 3);

            manager.ShowLoading();

            var canvas = manager.GetComponentInChildren<Canvas>();

            Assert.IsNotNull(canvas);
            Assert.IsTrue(canvas.gameObject.activeInHierarchy);

            yield return delay;

            manager.HideAll();

            Assert.IsFalse(canvas.gameObject.activeInHierarchy);

            manager.UnloadAssets();

            yield return delay;

            canvases = manager.GetComponentsInChildren<Canvas>(true);

            Assert.IsEmpty(canvases);

            Debug.Log("Test: manager show and hide loading passed");

        }

        [UnityTest]
        public IEnumerator Show_And_Hide_Menu()
        {

            yield return manager.StartCoroutine(manager.LoadAssets());

            var canvases = manager.GetComponentsInChildren<Canvas>(true);

            Assert.That(canvases.Length == 3);

            manager.ShowMenu();

            var canvas = manager.GetComponentInChildren<Canvas>();
            var controller = manager.GetComponentInChildren<MenuController>();

            Assert.IsNotNull(canvas);
            Assert.IsTrue(canvas.gameObject.activeInHierarchy);
            Assert.IsNotNull(controller);

            yield return delay;

            manager.HideAll();

            Assert.IsFalse(canvas.gameObject.activeInHierarchy);

            manager.UnloadAssets();

            yield return delay;

            canvases = manager.GetComponentsInChildren<Canvas>(true);

            Assert.IsEmpty(canvases);

            Debug.Log("Test: manager show and hide menu passed");

        }

        [UnityTest]
        public IEnumerator Show_And_Hide_GameOver()
        {
            yield return manager.StartCoroutine(manager.LoadAssets());

            var canvases = manager.GetComponentsInChildren<Canvas>(true);

            Assert.That(canvases.Length == 3);

            manager.ShowGameOver();

            var canvas = manager.GetComponentInChildren<Canvas>();
            var controller = manager.GetComponentInChildren<GameOverController>();

            Assert.IsNotNull(canvas);
            Assert.IsTrue(canvas.gameObject.activeInHierarchy);
            Assert.IsNotNull(controller);

            yield return delay;

            manager.HideAll();

            Assert.IsFalse(canvas.gameObject.activeInHierarchy);

            manager.UnloadAssets();

            yield return delay;

            canvases = manager.GetComponentsInChildren<Canvas>(true);

            Assert.IsEmpty(canvases);

            Debug.Log("Test: manager show and hide game over passed");

        }

    }

}
Run the tests in the Test Runner to verify everything is working. If you follow along in the Addressables Event Viewer you'll see that we load all the assets just to show one screen. We can easily optimize this later if needed by adding discrete methods to the UI Manager, but we'll come back to that when optimizing later (if needed).
Game Manager
Now that the UI Manager is working, we just need to hook it up to the GameManager, and then implement our first game workflow, which is to display the loading screen and the menu.
Go back to the "Scripts\GameManager.cs" file and edit:
using System.Collections;
using UnityEngine;

namespace SingleScenery
{
    public class GameManager : MonoBehaviour
    {

        // Configuration

        [Header("Events")]
        [Space(10)]

        [SerializeField] private GameEvent onPlayEvent;

        [Space(10)]
        [Header("Managers")]
        [Space(10)]

        [SerializeField] private UIManager uiManager;

        // Unity Events

        private void OnEnable()
        {
            onPlayEvent.AddListener(OnPlay);
        }

        private void OnDisable()
        {
            onPlayEvent.RemoveListener(OnPlay);
        }

        private void Start()
        {
            StartCoroutine(LoadGameWorkflow());
        }

        // Game Event Handlers

        private void OnPlay()
        {
            Debug.Log("Play!!!!");
        }

        // Game Workflows

        private IEnumerator LoadGameWorkflow()
        {
            yield return StartCoroutine(uiManager.LoadAssets());
            uiManager.ShowLoading();

            // Pretend we're loading more stuff here...
            yield return new WaitForSeconds(3f);

            uiManager.ShowMenu();
        }

    }
}
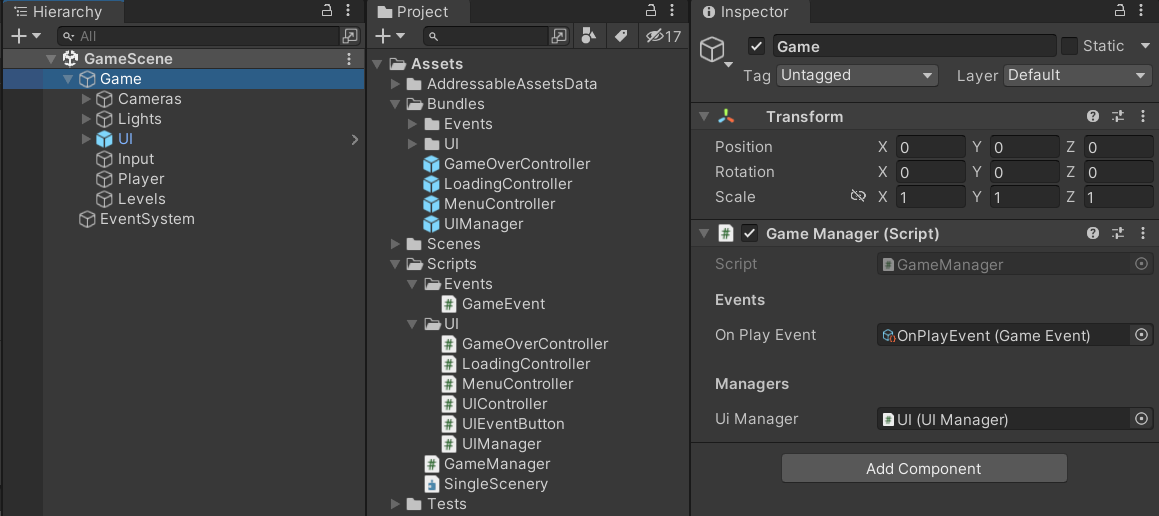
Select the "Game" root game object in the Scene and assign the "UI" game object in the scene to the Ui Manager field. Assign the "OnPlayEvent" to the On Play Event field.
Tests
For now, open the "GameManager_Tests.cs" script and just delete the single test method completely.
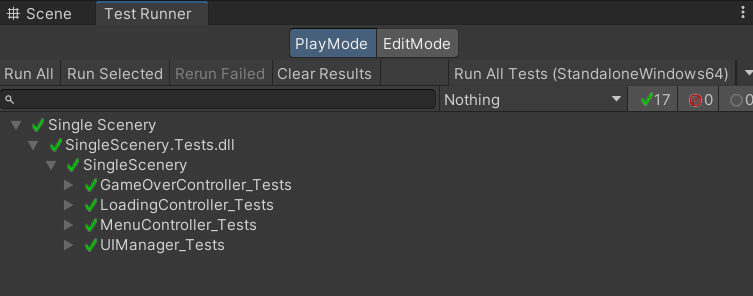
Go to the TestRunner and Run All to verify everything should work.
Play
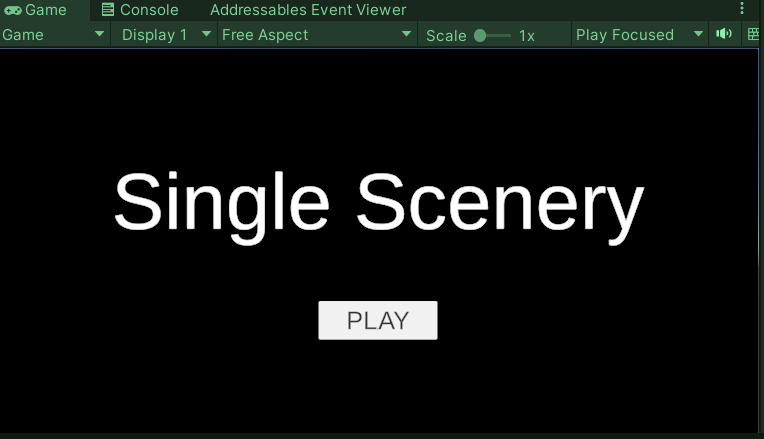
Finally we can play the game! Run play mode and you will see the loading screen display, then the menu. If you click the "PLAY" button, the menu should hide itself and a console log appear.
Summary
We've completed our UI for the game with controllers and a manager that can load and unload assets at runtime. We have a Game Manager that can orchestrate the UI and respond to events to implement high level game workflows. We have some decent test coverage to ensure our prefabs don't break after changes.
Source Code for this Post:
Next
Follow along to the next post in the series.
Unity Single Scene Architecture Series
If you're finding value in these posts, please leave a comment below to let me know (it's a lot of work) and share on your social media for others. Thanks for reading!


